Wednesday, August 29, 2012

Final Assembly

This weekend I was able to finish up the final assembly on the bike. The semi-finale to a 2 year project that has seen me change jobs, states, and marital status.

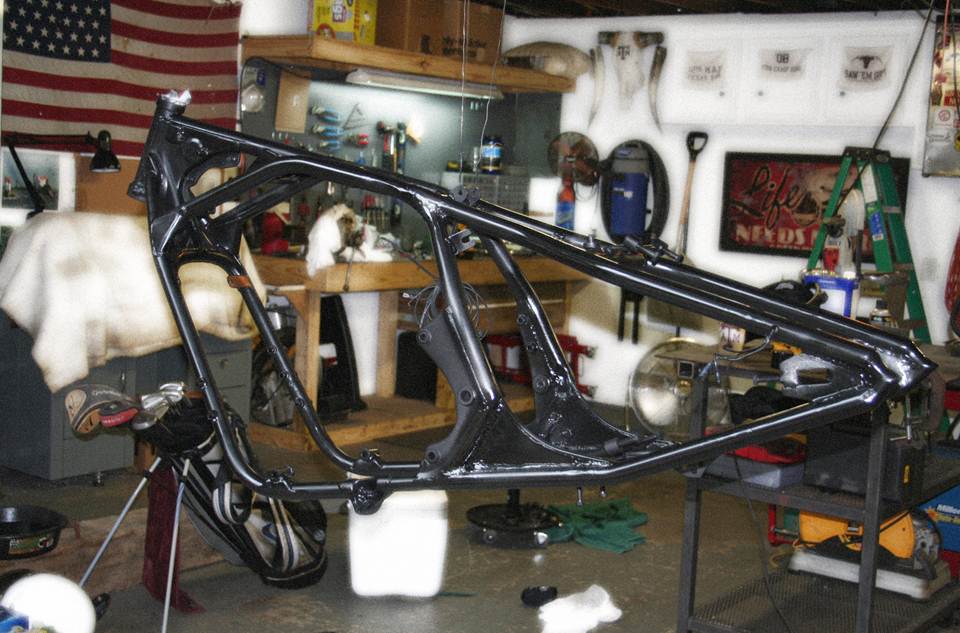
It started by getting the engine into the frame. Actually, we put the frame onto the engine. I invited my brother, his roommate, and a friend to help out in exchange for some beers and burgers. It was much easier than I expected.


We loaded the bike onto the stand and the fun was ready to begin.


Install the springer front end, kick stand, replace wheel bearings, axle spacers, wheels, brakes, forward controls...


...wooden seathandlebar risers, handlebars, controls, carbs, headlight, license plate mount, oil pan...  


...offset sprocketexhaust, pod filters, custom cables, battery box, tail light...


...electrical, oh electrical...


...gas tank, gas cap, check everything, check it again, fill with fluids...then its out of the garage for a test!

  
Starting her for the first time...very very loud...love it...just hope the neighbors do, too. 


Took her for a quick ride and felt amazing.


Time for some glamour shots.


 And of course, a before and after...total transformation.


Still some work to do: the plan is to ride for a bit, work out the kinks, then have it professionally painted.

Thanks to all who helped along the way, especially my wife. Thanks for being so supportive and understanding! Love you!

Monday, August 20, 2012

Fresh Start to Final Assembly

This weekend, after a lot of prep and a lot of help, I got most of the bike painted and ready for final assembly.

Here's the "paint booth"...or at least it was until it started to rain. The frame is ready for paint after much sanding, scuffing, and cleaning.


In addition to the frame, there were about 20 or 30 small parts that needed paint as well. I used an Appliance Epoxy spray paint that is stronger than regular spray paint...we'll have to wait and see.


My good friend, Josh, and wife were a huge help the entire day. Made the tedious tasks of cleaning and painting enjoyable.


After many coats, the frame was hung to dry. A fresh start for final assembly.


All of the little parts were also hung to dry. Was crazy to see all of these parts together, knowing that each was designed, engineered, and hand made for a purpose.


Soon these will be put on the bike and go unnoticed to most. But those that do notice them, will appreciate the thought and craftsmanship that went into each one.


Wednesday, August 15, 2012

Fixing Dents in Exhaust

The exhaust on the Honda is an aftermarket, 4 into 1 that runs under the engine; making it the lowest point on the bike. The previous owner must have tried to Evel Knievel over some curbs or something, because the underside of the exhaust pipes were flattened, dented, and all scraped up. Rather than build or buy new ones, I decided to fix these.

The pipes are getting painted and wrapped with DEI Titanium Wrap, so I wasn't too concerned with the scrapes; just wanted to make the pipes round again. First step was to seal the outlet and install a male connection for an air hose.


This gave me a place to connect my air compressor. I would use the compressor and regulator to keep the internal pressure at 20 psi.

To cap the other end (without welding and damaging the sealing surfaces) I picked up a set of high temperature, expanding plugs from McMaster-Carr. I did have to cut a slot in the thread to get them really tight, but they worked great.


Next, I placed the exhaust in a vice and hooked up the air hose. I made sure the plugs were facing toward the ground in case one were to come loose. I slowly turned the pressure up to 20 psi, and sure enough, one of the plugs made a loud pop and shot into the ground. After a quick reset I was ready to go.


Once everything was holding steady, it was time for the torch. The idea is to heat up the dents and flat sections slowly and let the internal pressure push them out. This requires a lot of patience and experience with the torch...it's very easy to put a hole in the thin pipe. For that reason, I took my time, wore a face shield and lots of leather, and stood to the side of the pipe as an extra precaution. 


Here's a pretty good "before" and "after". The left pipe is almost done, and the right is still flattened out.


Another "after" picture with all the pipes treated. It's not perfect, but it removes the dents and flat parts well enough for pipe wrap...and keeps me from making new ones!


Wednesday, August 1, 2012

Kodak Playsport Wand

My wife and I have a Kodak Playsport ZX3 and love it. We use it all the time, but recently I wanted to make a special wand mount to for us to use...here's how I did it.

I started with an old golf ball grabber that broke. I knew I kept the extending handle for some reason!


Next, I scribbled down some dimensions on a notepad and then it was over to the lathe for some quick machining.

Then I welded the parts together that would hold the camera, and welded together a handle out of some scrap steel and a 1/4"-20 bolt.


I place a rubber washer between the camera and mounting surface to give the camera a soft surface to tighten against. Here's the first fitment test.


I realized that the top-heaviness of this design may cause the camera to flip upside down, so I added an extra long handle that acts as a counterweight. I also added a retention system just in case the camera comes off the mount.


The Playsport is waterproof, and we use that feature often, so I added some pipe insulation wrap that keeps the wand and camera afloat in water. 


Here it is ready for use! The extension handle will be handy.


And here's a test video I shot.