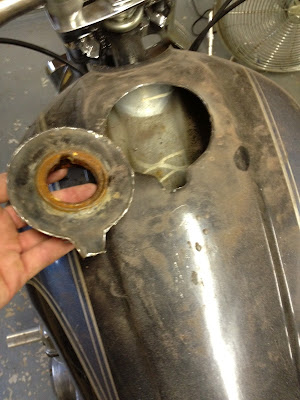
After looking at the gas tank for a while, I decided I didn't like the gas cap - the way it looked and where it was on the tank. So I got out the dremel and some files and got to work.
I started by cutting out a recessed area on top of the tank. This is where the old gas cap screwed in. I should also note that before any cutting/welding, I removed all traces of fuel from the tank and refilled it with water for added safety.
I cleaned up the edges, traced, and cut a piece of sheet metal to fit.
I welded the new piece on once bead at a time, being careful not to overheat the thin material.
After grinding the welds smooth, I used a combination of drilling, grinding, and filing to place a perfect circle where I wanted the new gas cap to be.
Then it was over to the lathe to machine a bung. The bung has a step that I'll use to weld it to the tank, and internal threads that the gas cap will screw into.
Here's the bung dropped into place, ready to be welded.
Next, I'll begin machining the new, custom gas cap. Here's what I have in mind. Stay tuned!


Thank You for sharing blog with us. CI Car International specializes in high-quality Inside Handle Manufacturers for a wide range of vehicles.
ReplyDeleteView more >>
Inside Handle Manufacturers
Outside Door Handle
Side View Mirrors