Our master bedroom needed some TLC and my wife had been gathering ideas for a headboard for some time. So we put the ideas to use and I surprised her with a couple extras that brought it all together.
We'd been without a headboard for a few months since we broke our last one. This is how our room started out.
I grabbed an old cardboard box and we began laying out the outline of the headboard and button location.
Then we took the template outside and traced it on to some MDF.
After cutting out the headboard frame with a jigsaw, my wife got to sanding the rough edges and drilling holes for the buttons. She makes it look easy...and good...mmm MMM you drill that MDF uh huh.
Back on track. I drilled in some screws on the back of the headboard next to the button holes; these would be used to tie off the buttons. I also ripped a piece of 1x6 at a 45; this would make it very easy to hang on the wall, nice and level.
For the padding, we used 2 foam mattress pads form wally world (much cheaper than foam at the craft store), a layer of batting, and a can of spray adhesive to keep it all in place. Here's my wife cutting out the foam.
The foam was cut exactly to the size of the headboard, while the batting was cut oversize so we could fold it over the back and staple it. Starting from the middle, pulling the batting tight, and many well placed staples worked great.
We used the same technique for the cover material, but before attaching it my wife laid it out and ironed out any wrinkles. We also made sure to pull the material taut and checked often for creases or wrinkles.
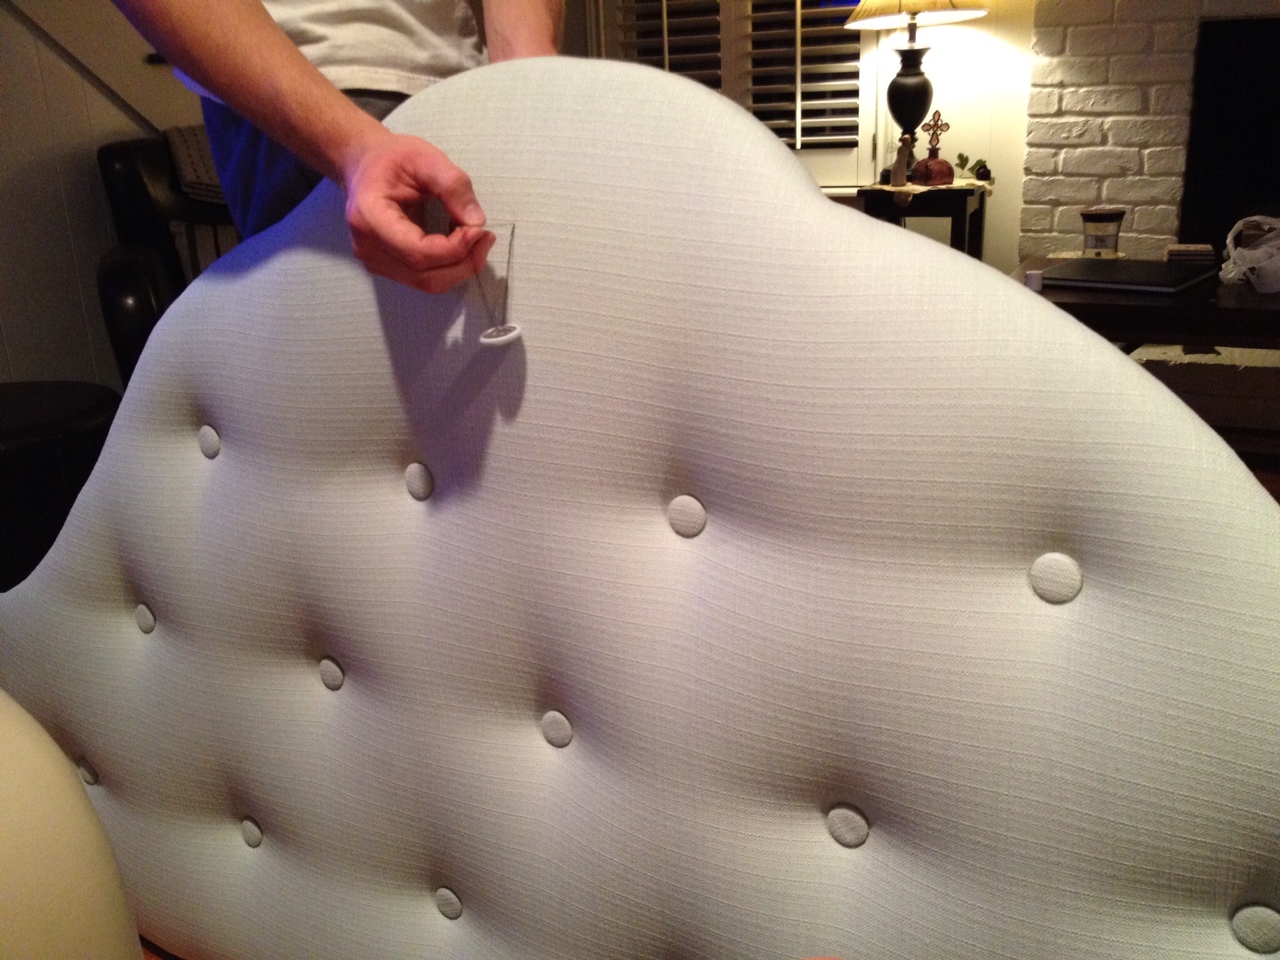
The buttons were a bit of a challenge. We were using heavy duty fabric for our cover material so it was thicker than normal and wouldn't work with the button kit. So I had to try and reduce the thickness somehow; I ended up using sandpaper to grab the backing on the fabric, then pulled the backing off to thin it up. Then I made a little contraption the help press in the button with a hammer, and it somehow worked.
Attaching the buttons was simple, but it's definitely a 2 person job. I pushed the needle through from the back, attached a button, thread it back through to the back, then while my wife pressed the button into the headboard, I tied the thread off to the screws out back.
Lookin' good and ready to hang.
But first, we had to hang a little surprise I got for my wife from Lowe's. After she wrapped the cords in burlap, we hung 2 of these next to the bed.
She's happy, I'm happy. Fun project.