Monday, June 25, 2012

Homemade Gas Cap

Finished up the gas cap last week. It was a fun project and I'm really happy with the result: a good looking cap that's fuctional and one of a kind.

I started in SolidWorks to get my ideas on "paper". The design had to include vent holes to allow the tank to breathe and a seal to prevent gas from spilling onto the tank. Here's what I came up with. 


I ordered some material and got this honkin' piece of aluminum.


After some machining, there was some more machining, then finally she had the basic shape and was ready for threads.


I cut the threads, then flipped the part around and knurled the edge. Then, I started cutting steps in the top to get the curved surface.


After the steps were cut, I took a file and carefully started to file away the ridges until a smooth curve began to appear.


After several passes with the file, then sandpaper, and finally some scotch brite, the top of the cap was done and looking great.


Next, it was time to finish out the business end of the cap. It was also a good time to get my wife on the lathe and teach her about facing operations...she's a natural!


I drilled and tapped the bottom of the cap to accept a filter, and cross drilled a small hole to provide an air passageway. Venting the gas cap allows the tank to breath; keeping it from exploding in the heat, and allowing gas to gravity flow down to the carburetors.


Monday, June 18, 2012

Gas Tank Bung

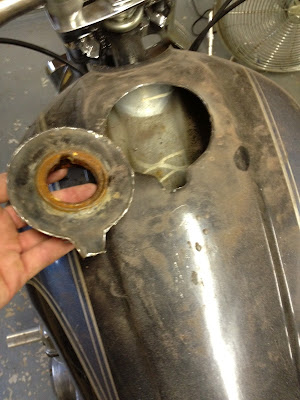
After looking at the gas tank for a while, I decided I didn't like the gas cap - the way it looked and where it was on the tank. So I got out the dremel and some files and got to work.

I started by cutting out a recessed area on top of the tank. This is where the old gas cap screwed in. I should also note that before any cutting/welding, I removed all traces of fuel from the tank and refilled it with water for added safety.


I cleaned up the edges, traced, and cut a piece of sheet metal to fit.


I welded the new piece on once bead at a time, being careful not to overheat the thin material.


After grinding the welds smooth, I used a combination of drilling, grinding, and filing to place a perfect circle where I wanted the new gas cap to be.


Then it was over to the lathe to machine a bung. The bung has a step that I'll use to weld it to the tank, and internal threads that the gas cap will screw into.


 Here's the bung dropped into place, ready to be welded.


Next, I'll begin machining the new, custom gas cap. Here's what I have in mind. Stay tuned!


Wednesday, June 6, 2012

Forward Controls

From the start I knew I wanted forward controls on the bobber. Just recently I completed all the levers and linkage to make it happen.

The shifter was fairly simple. I used the stock foot lever, bent it to shape, and drilled a hole to connect the transmission to the forward control.


And here's the finished left side.


The brake side was a little more complicated. The stock bike had a lever mechanism to transfer movement from the front control to the rear drum brake. I lost the mounting point for the lever mechanism when I cut off the rear suspension and hard tailed the bike.

What I did have, though, was the lever mechanism itself and also a bushing that was used for a pivot point for the swingarm.


So I took some measurements to begin the design.


The first challenge is that the shaft was too big to fit. Rather than try to enlarge the hole, I chose to turn down the shaft.  


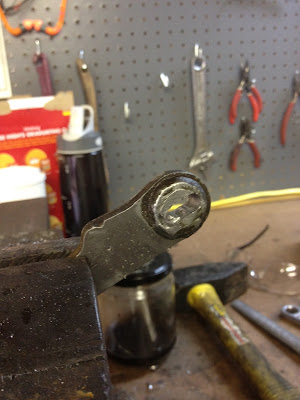
Being able to fit the shaft in the bushing meant I had to cut the lever mechanism in 2, then reassemble once installed. I think the pictures will help explain, but basically it was a lot of patience and a lot of filing.


This is after and hour of filing...the male end is taking shape.


And next was the female end...I started by center punching and drilling holes to reduce the amount of filing I had to do.


Another hour of filing and the female end was taking shape.


The final step was to drill and tap a hole in the male piece to hold everything together.


Patience paid off...the fit was great.


Here's the fully assembled lever mechanism for the rear brake.


Some heating, bending, and drilling of the stock levers in addition to making and mounting the new brake stay finished it off. Forward controls...done!